
Printing to Fabric Ideas - Make a Nostalgic Tote
Expressing your Creativity in Printing to Fabric -
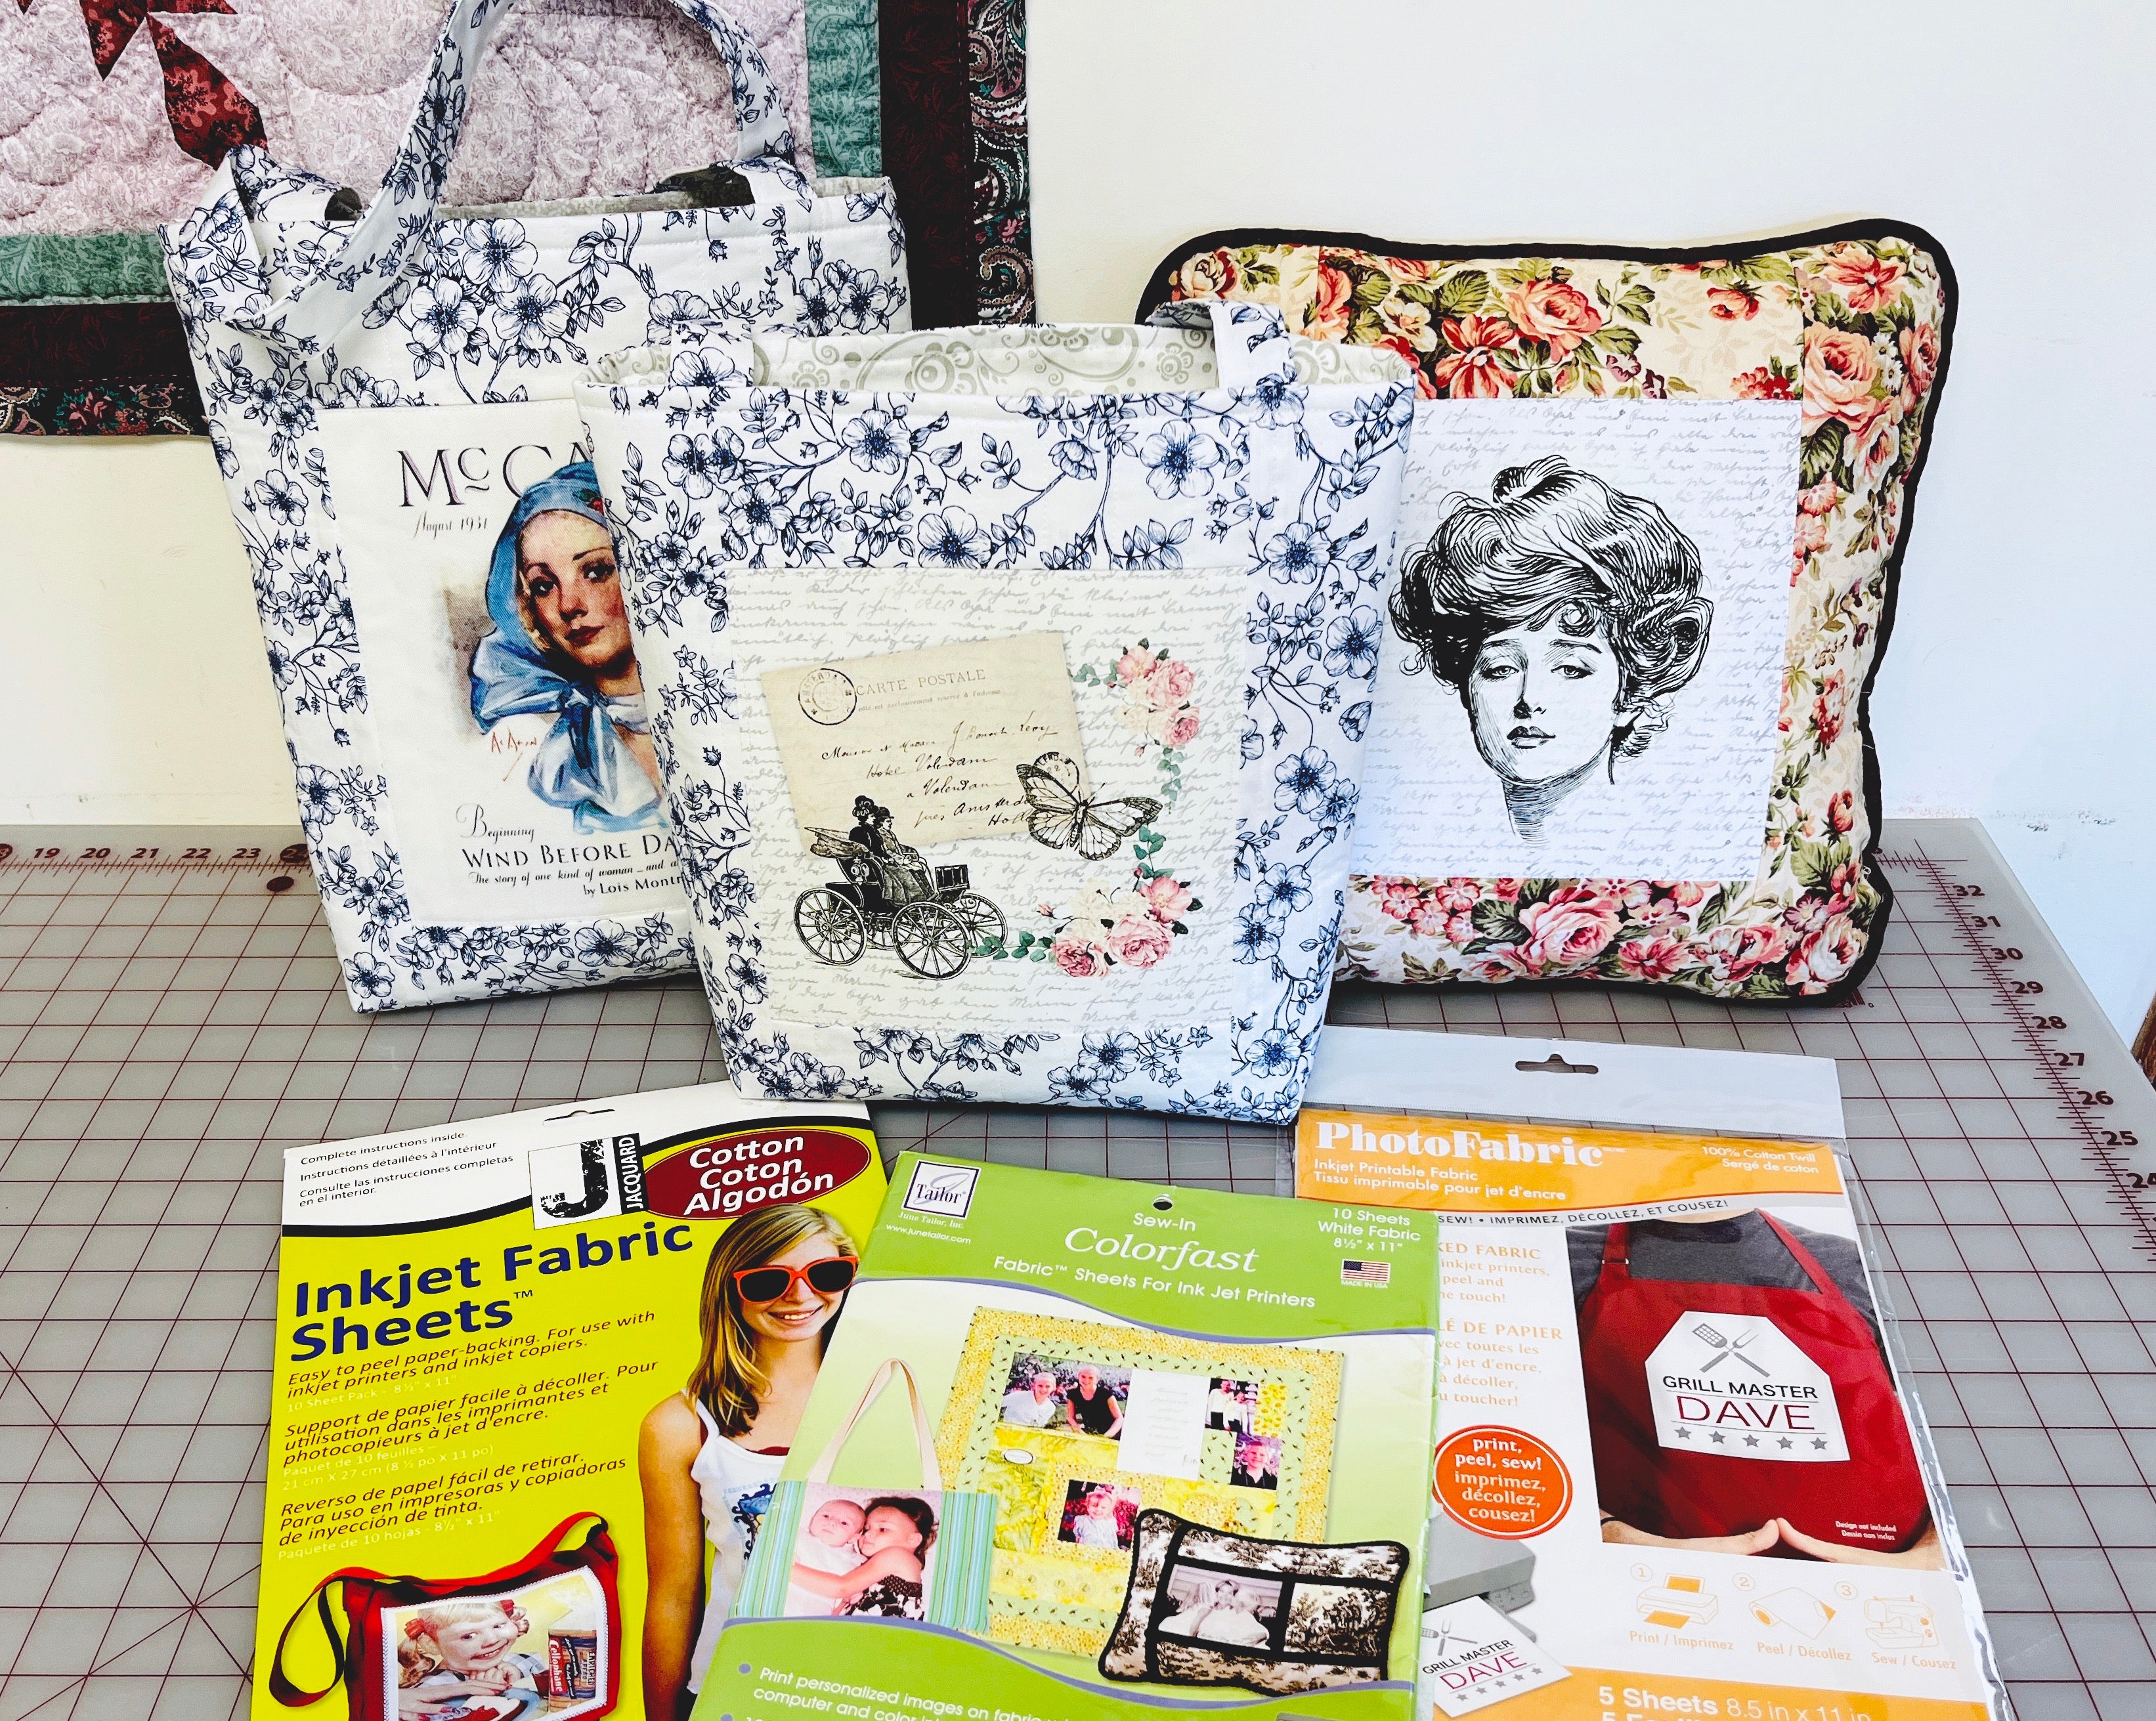

Create a Tote with a Favorite Print
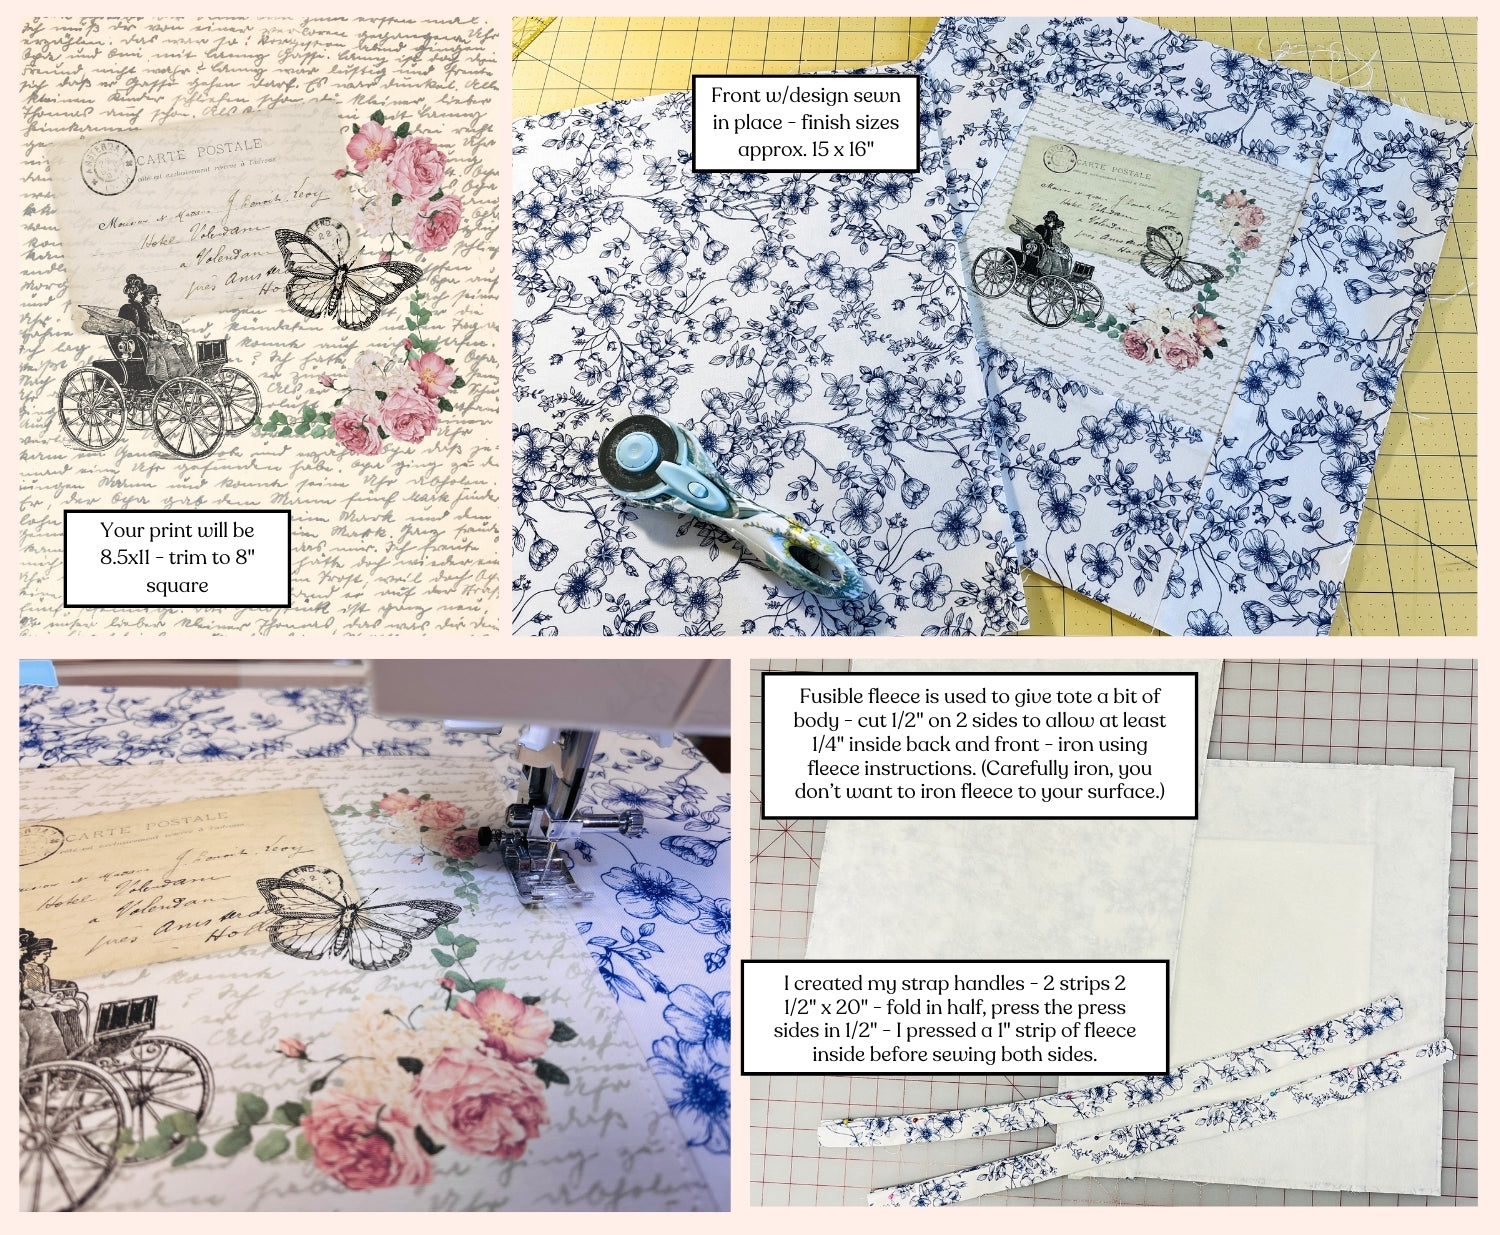
Choose a favorite Inkjet fabric pack or a fabric with good a body. Create your own collage print as I did in Canva or your favorite program. Maybe you may choose a print that you love to see printed to fabric. Directions can be found in another blog for printing Quilt Labels - much the same, this is using an 8.5x11" letter size print trimming to 8x8". The 4x9" fabric and 4x16" will frame the 8x8" print.
Guidelines for Assembling your Tote -
Fusible fleece is ideal for this project as it adds both body and a quilted feel when sewn. You can find it at your local fabric store, and look for one that is approximately 1/8 to 1/4 inch thick.
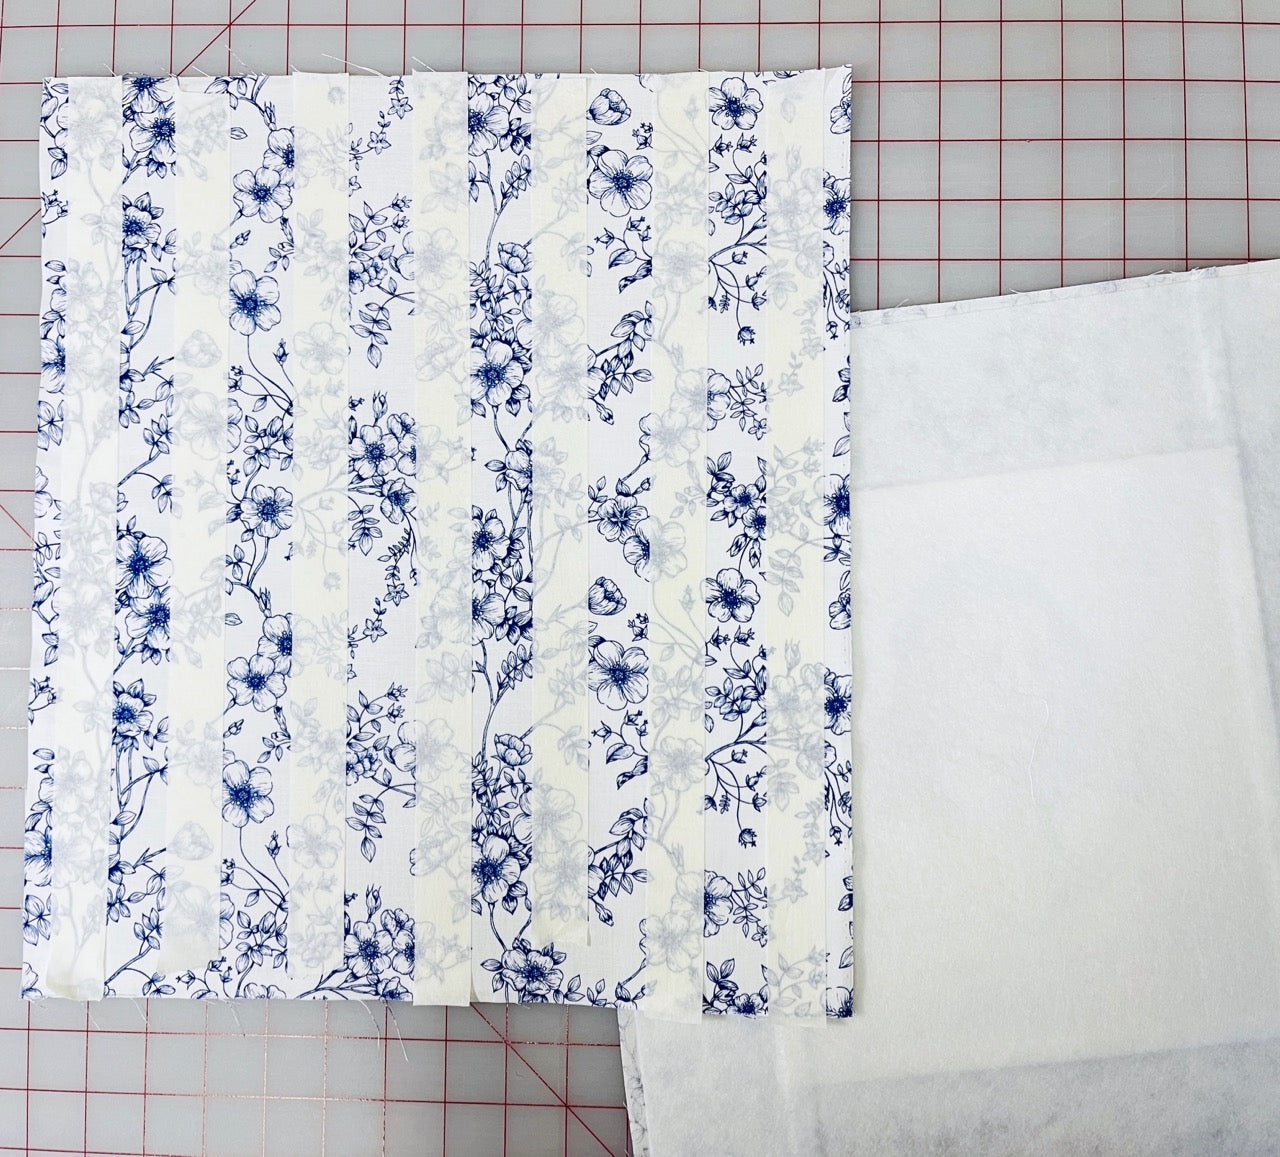
Press the fusible fleece to the back of both the front and back assemblies, cutting it 1" shorter on 2 sides and follow the fusible instructions, ensuring that the fusible is 1/2" inside the perimeter of the fabric.
Sewing Straight Quilt Lines using Masking Tape
You now have a back fabric and your front fabric assembled with your design framed with pieced border. Using 1" masking tape, lay tape 1" apart as in the photo starting from the center out. Do the same with the front, stopping at the design print, and backstitch a couple of stitches. Sew along masking lines, and finish having 1" quilted rows.
Place completed sewn front and back right sides together, and sew across the bottom 1/2".
Add a Pocket & Sew a Tote Lining -
-

Create a pocket
Create a pocket by cutting a piece of fabric matching the front of tote to 7" x 8". Next, fold and press all four sides by 1/2". The top should fold down again to form a hemmed top. Press all sides and stitch across the folded hemmed edge at the top.
-

To create the lining and add a pocket:
Choose a complimenting lining cotton fabric - (Cut 2) 15"x16" and sew the right sides together at the bottom. Align your pocket as shown centered, pin in place, and stitch around 3 sides, maybe includeTo create the lining and add a pocket:
1. Choose a complementary lining cotton fabric and cut two pieces measuring 15"x16".
2. Sew the right sides of the fabric together at the bottom.
3. Align your pocket in the center, pin it in place, and stitch around three sides.
4. Optionally, include a stitched line down the pocket to create a divider. a stitched line down the pocket as a divider. -

Inserting Handles & Assembling
This diagram is from another tote pattern - I find it easier to illustrate the assembly with handles. Of course, the lining is in (two parts) sewn at the bottom as the top.
Sew sides 1/2" from bottom to top - Leaving 6" open on one side of the lining to turn inside out later.


Creating a gusset - Tote base
Please verify the square at each corner is 1", as indicated in the image illustrating front and lining.
n the smaller image, take note of the clip. When holding the squared cut open at each corner as shown in the smaller picture, grasp the open corners pull straight with the raw edges facing out. Fold the seam allowances to opposite sides and align the seam center before sewing across by 1/2".
• If you require further instructions, please contact me.
Finishing the Tote -
-

Heading for the Finish
After sewing the gusset, you are ready to turn the tote inside out through the 6" opening at the side of the lining. Finger press lining opening and pin/sew opening closed. Place lining inside of tote as shown in the photo.
-

Finishing the top of Tote
Arranging the top placing lining a little more inside when clipping or pinning. Sew 1/4" in around the top of the tote.
-

The Finished Tote
I love nostalgic designs, and this tote is compact and expandable. The simple construction is suitable for various types of totes, though for lightweight use. It's perfect for sewing projects, knitting, and more. I hope you found this tutorial helpful. Feel free to ask any questions!


