Printable Quilt Labels - How to Print to Fabric

Printing Quilt Labels - Print to Fabric - How?
Labels can be created in Microsoft Powerpoint, Mac Keynote, Free Canva, any app that will allow you to import a label or Photo (can be cropped and enlarged or reduced slightly) to your document. Create a text box over the label in the open area of label design, add your message or information - select it to choose your font, size it and when happy with design - insert fabric label correctly in printer for printing and "print".
There is more information in our blog -
"Creating DIY Quilt Design Labels - Basic Instructions"
Printing Quilt Labels from your printer - Let's Do It!
-

Quilt Label Beginning -
If using a Retail Print to Fabric Pack, follow their instructions -
This is a quick and easy way to create. Label sheet will travel through your inkjet printer. You may find these fabric packs online or in your local fabric or craft store. So easy!
Freezer paper is perfect for quilt labels, you may find it at your grocery store. Most important is pressing with an iron till paper sticks well.
Also my favorite is letter size sticker paper, important to smooth out all wrinkles, ink will gather on any bump in fabric.
-

Choosing Fabric for Quilt Label
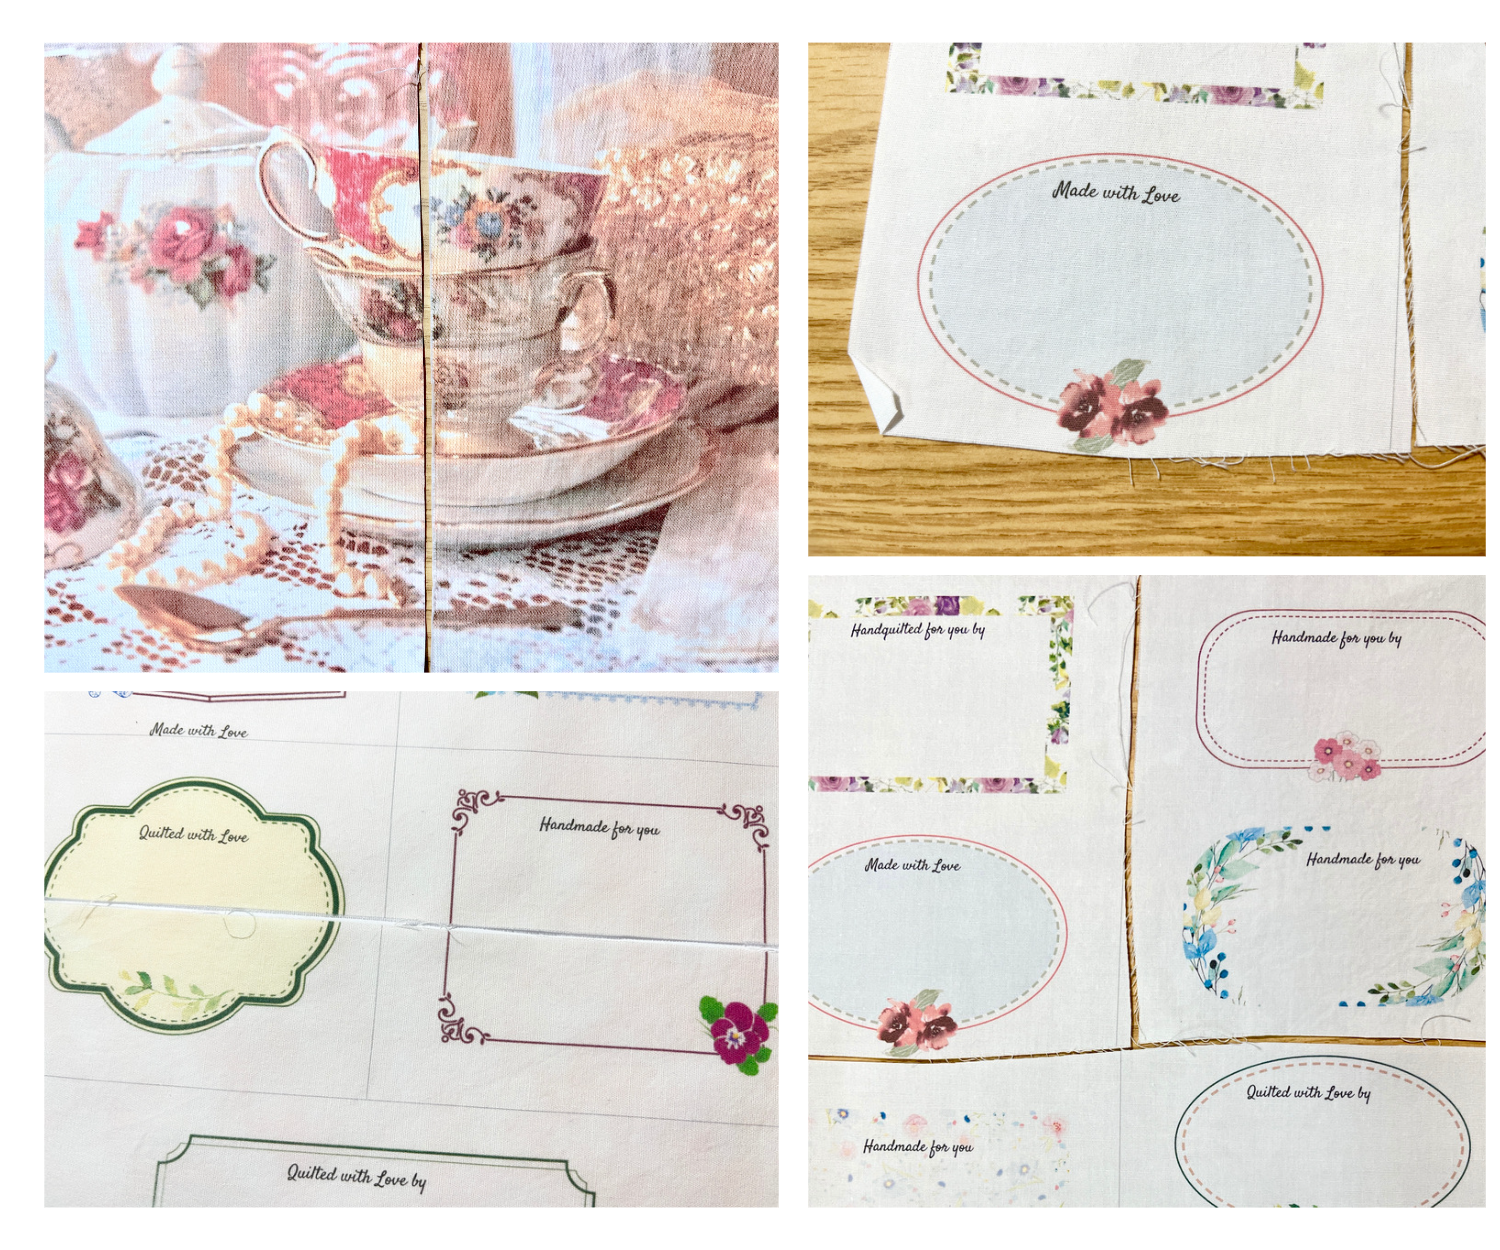
I try to use a fabric near the same quality as my quilt fabric and always 100% cotton, this will help with wear. Maybe adding a complimenting shade of light pastel color or print as shown in photo that may match my quilt front. Always wash your fabric first, no fabric softener, we want to remove manufacturer chemicals and sizing. This helps with stabilizing ink, adhering freezer paper.
• Note - In using a pastel print, choose one very light pastel, with equally light print - In printing, your label you create can become lost competing with pastel print.
-

I was skeptical at first -
I’ve tested using Dawn liquid and soaking for hours,and scrubbed and afterward I was happy with the results, very little if any loss of ink color. Many have used the products Retayne and Bubble Jet Set - reviews are mixed. While some say it's great, others have reported that the products can cause the ink to fade even more. It's best to try these products and test for yourself.
• Another thing to keep in mind in printer setup - Select "photo" and "cardstock" this can help improve the printing quality on fabric.
• Remember: After printing your fabric, leave it overnight - it allows the fabric to rest and absorb the ink. Press with a hot iron for about 8 seconds, move, and press again, and again - on both sides of the fabric to set the ink


Preparing to Print Quilt Label to Fabric
-

Freezer Paper Method - Quilt Label
You will need -
• Freezer Paper
• Fabric of choice
• Scissors and rotary cutter
• Iron and a Ink Jet Printer
1. Begin with a piece of fabric a little larger than 8.5” x 11” and press with iron. Next, cut a piece of freezer paper for approx. 8.5” x 11” - and using iron, press (shiny side) to wrong side fabric until it sticks, pay attention to edges sticking. -

Preparing Label Sheet -
2. Trim the fabric/freezer paper to 8.5” x 11” - I use my quilt mat, rotary cutter and ruler to square corners correctly. You can use a sheet of 8.5” x 11” paper to double-check the size. Please use a rotary cutter to prevent frayed edges, should be no overhang, you won’t want anything to snag in the printer.
-

Printing your Quilt Label
3. Place in your printer. Double-check that it’s placed so that the ink prints on the fabric side and not the paper side. ( You can test with a sheet of paper if you are unsure of which side, by marking an “x” on one side, place in the printer, and print.. remembering how it went in. :)
Stay with your printer to make sure the sheet with fabric makes the trip through.


Label Sticker Paper Method for Quilt Labels
-

Sticker paper help -
This is another method I like - full sheet label paper is available and reasonably priced. Great for testing fabrics and ideas.
• Sticker Paper can be difficult to separate backing. A pin can come in handy to score a corner, bend and use as a start to remove. Also useful to score the front of paper adhering to fabric to help removing after printing. Next -
-

Removing backing - smoothing to fabric
Follow instructions above down to freezer paper, then continue here. Wash fabric first and press, cut piece near size of 8.5 x 11" - lay back side up and smooth -- Tear the backing from the label sticker paper and position over fabric and press from center out with your hands smoothing out wrinkles.
-

Trimming - Ready for Printer
Smooth both sides giving attention to any creases.
Trim with scissors or rotary cutter. Careful not to leave threads that may catch in printer. Then position in printer and print.