Create a Vintage Pillow - Printing to Fabric -

A Nostalgic Pillow for Printing to Fabric -
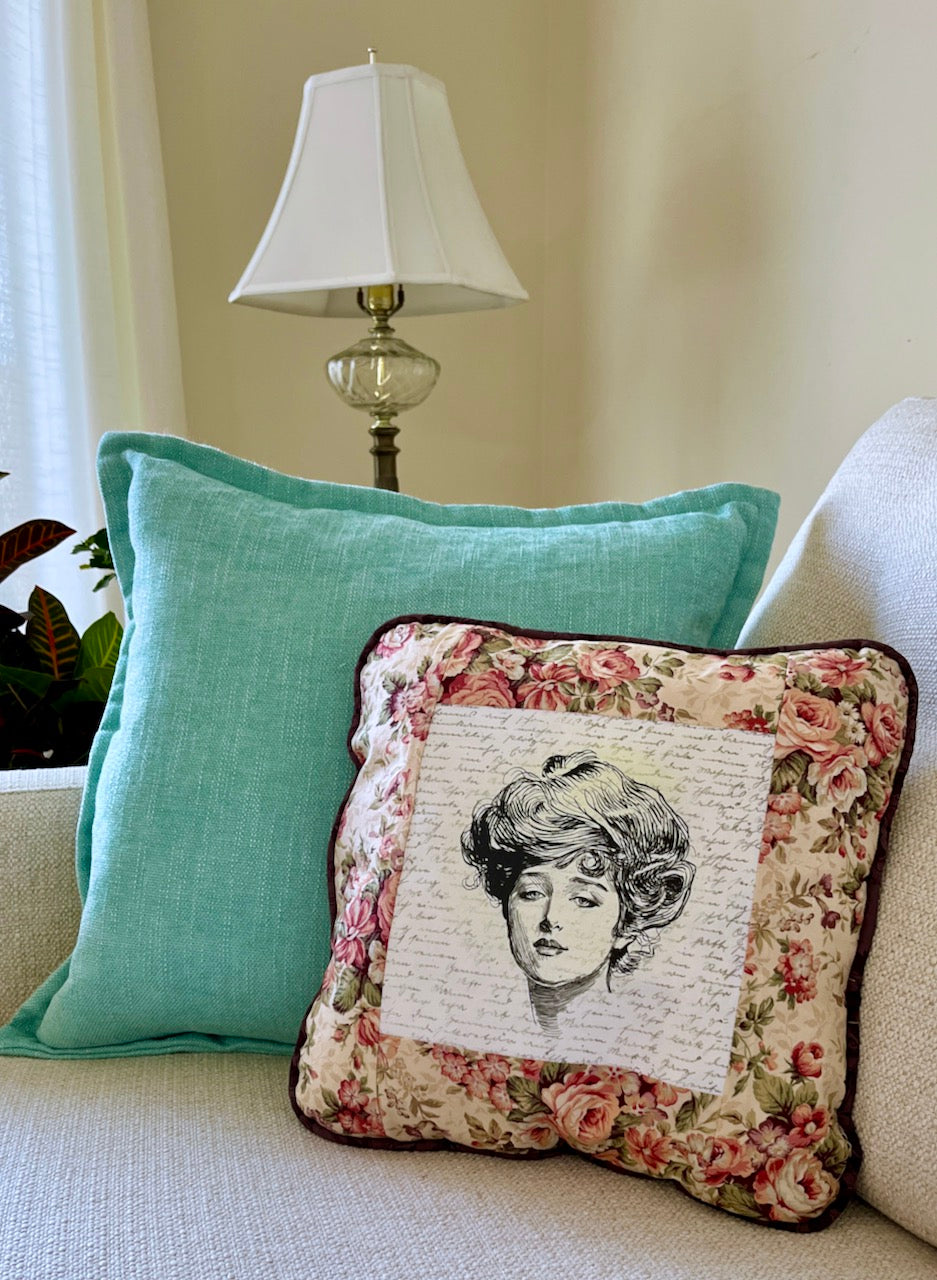
Explore your imagination for ideas to print on fabric. Create a pillow with a print you cherish or a print from a 1930s magazine cover. You can also use a photo of your pet, a Parisian ad print, a sketch, and more. This is your creative project, with so many ideas to explore.
For a pillow or tote, I prefer a slightly heavier fabric with interfacing to give it more body. I added cord piping, but you may have other ways to finish this pillow. Have fun!

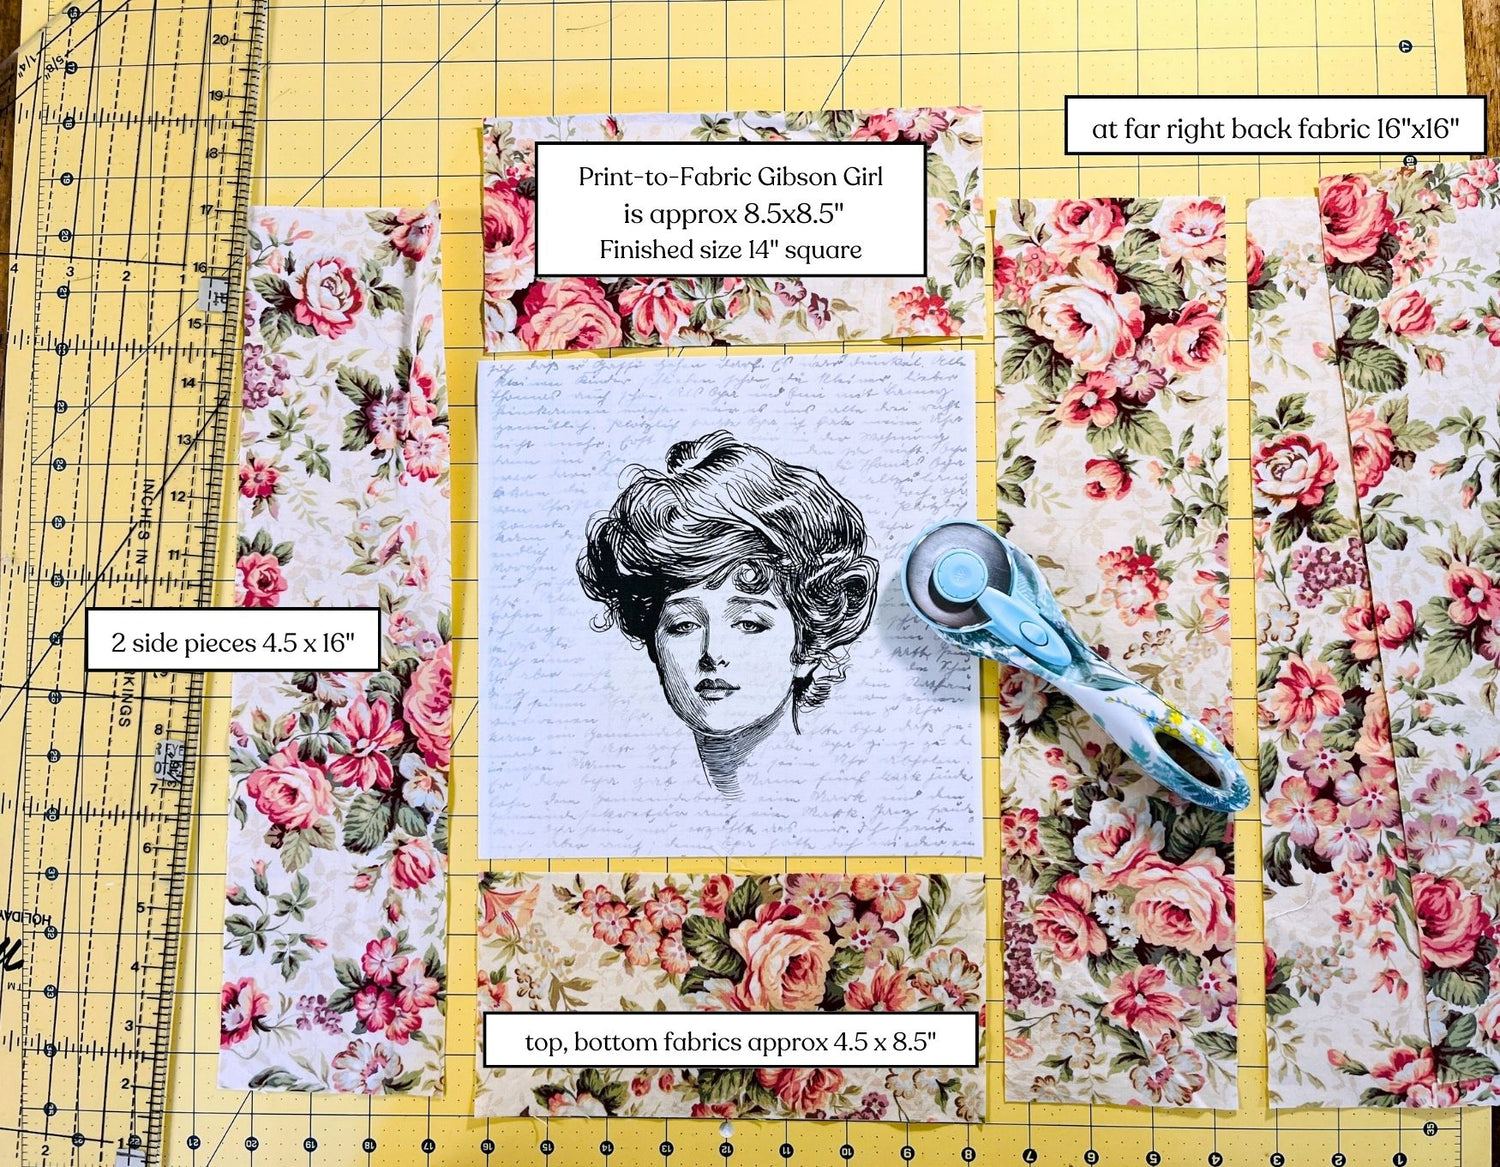
A Quick Layout of Sections to cut -
Cutting your sections or blocks, note sizes and cutting lengthwise on the grain of fabric.
Your print can be of your own fabric created with freezer paper or other methods. A fabric pack sheet is best, see my blog -
Putting it together -
-

Sewing Sections Together
This is an item that probably won't need washed - though using your inkjet following instructions, you could skip the test.
Sew the top and bottom first, then press seam to side, then sew the side sections, press.
-

Add Interfacing to Back
I used a fusible interfacing, cutting it shorter than the sewn portion. I don't like to take a chance of pressing to my mat.
-

Use a template for round corner
A small plate, or use a roll of tape to create a template round corner and trim.

To the Finish
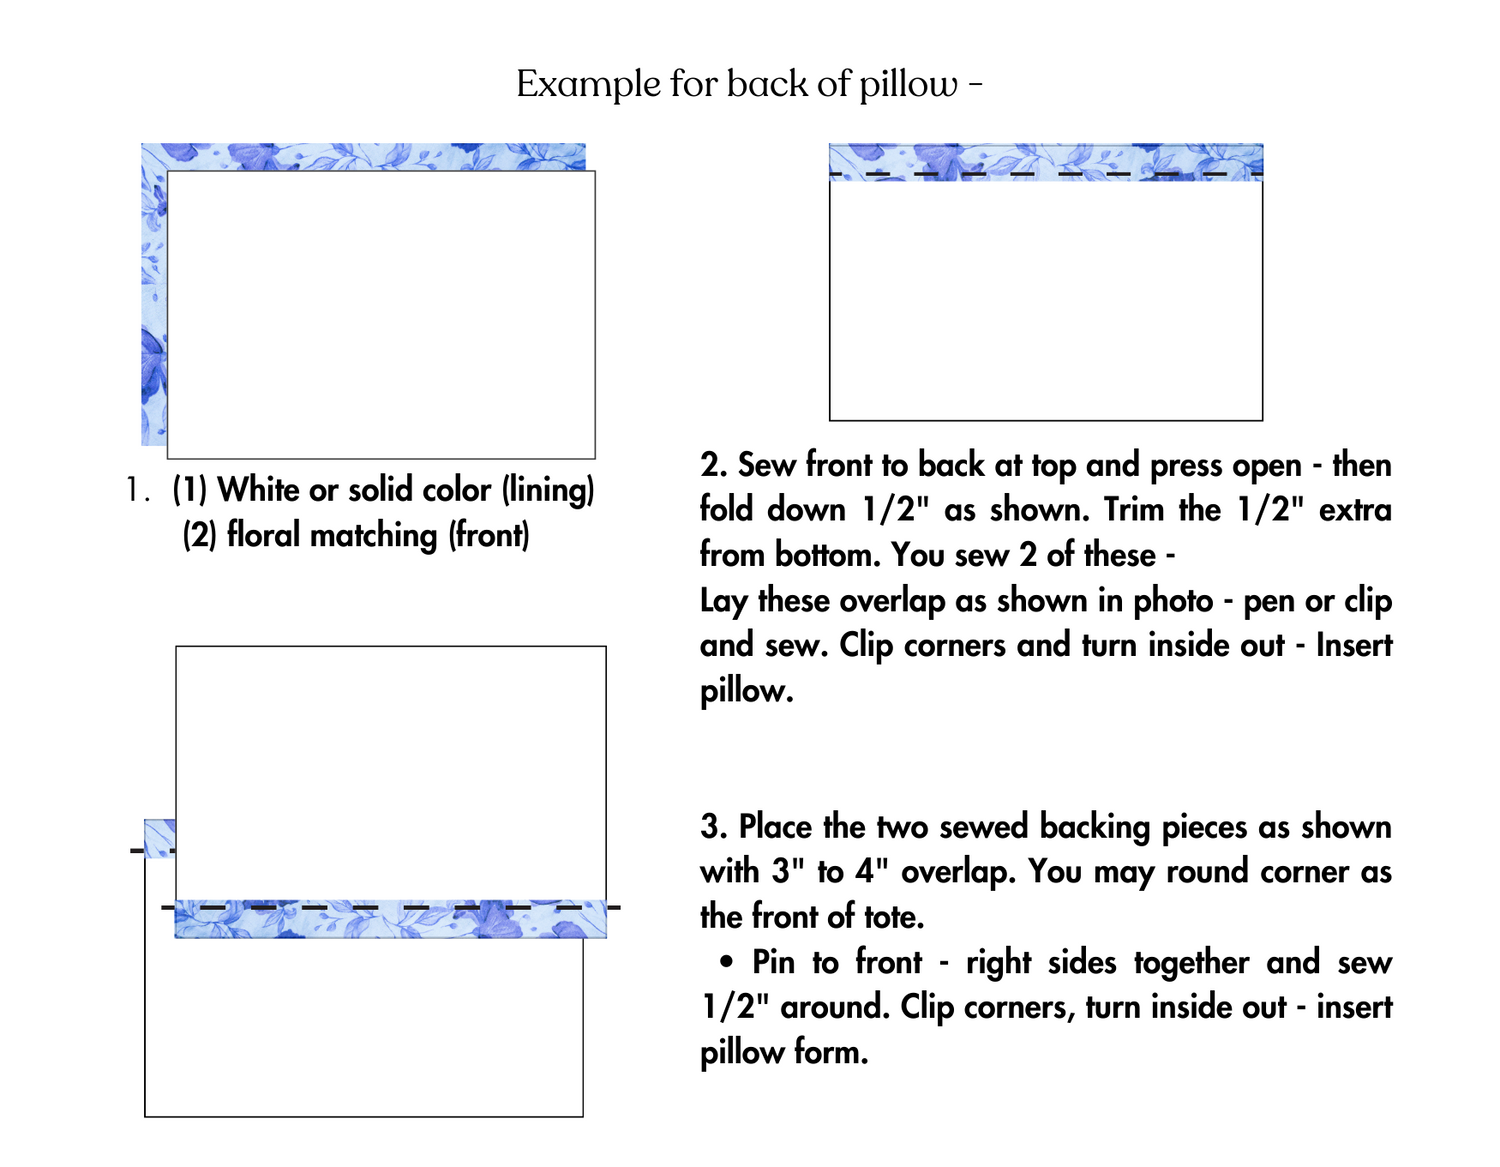
Finishing the back - creating two sections with a thin cotton lining that will overlap 3 to 4" - follow the diagram to create, then sew to the front section right sides together.
Enjoy! and Questions are always welcome - contact me!


