Create a Pillow with a Favorite Nostalgic Print

You could also choose a photo of your pet, holiday print, peronalize for a friend. Possibilities are endless.

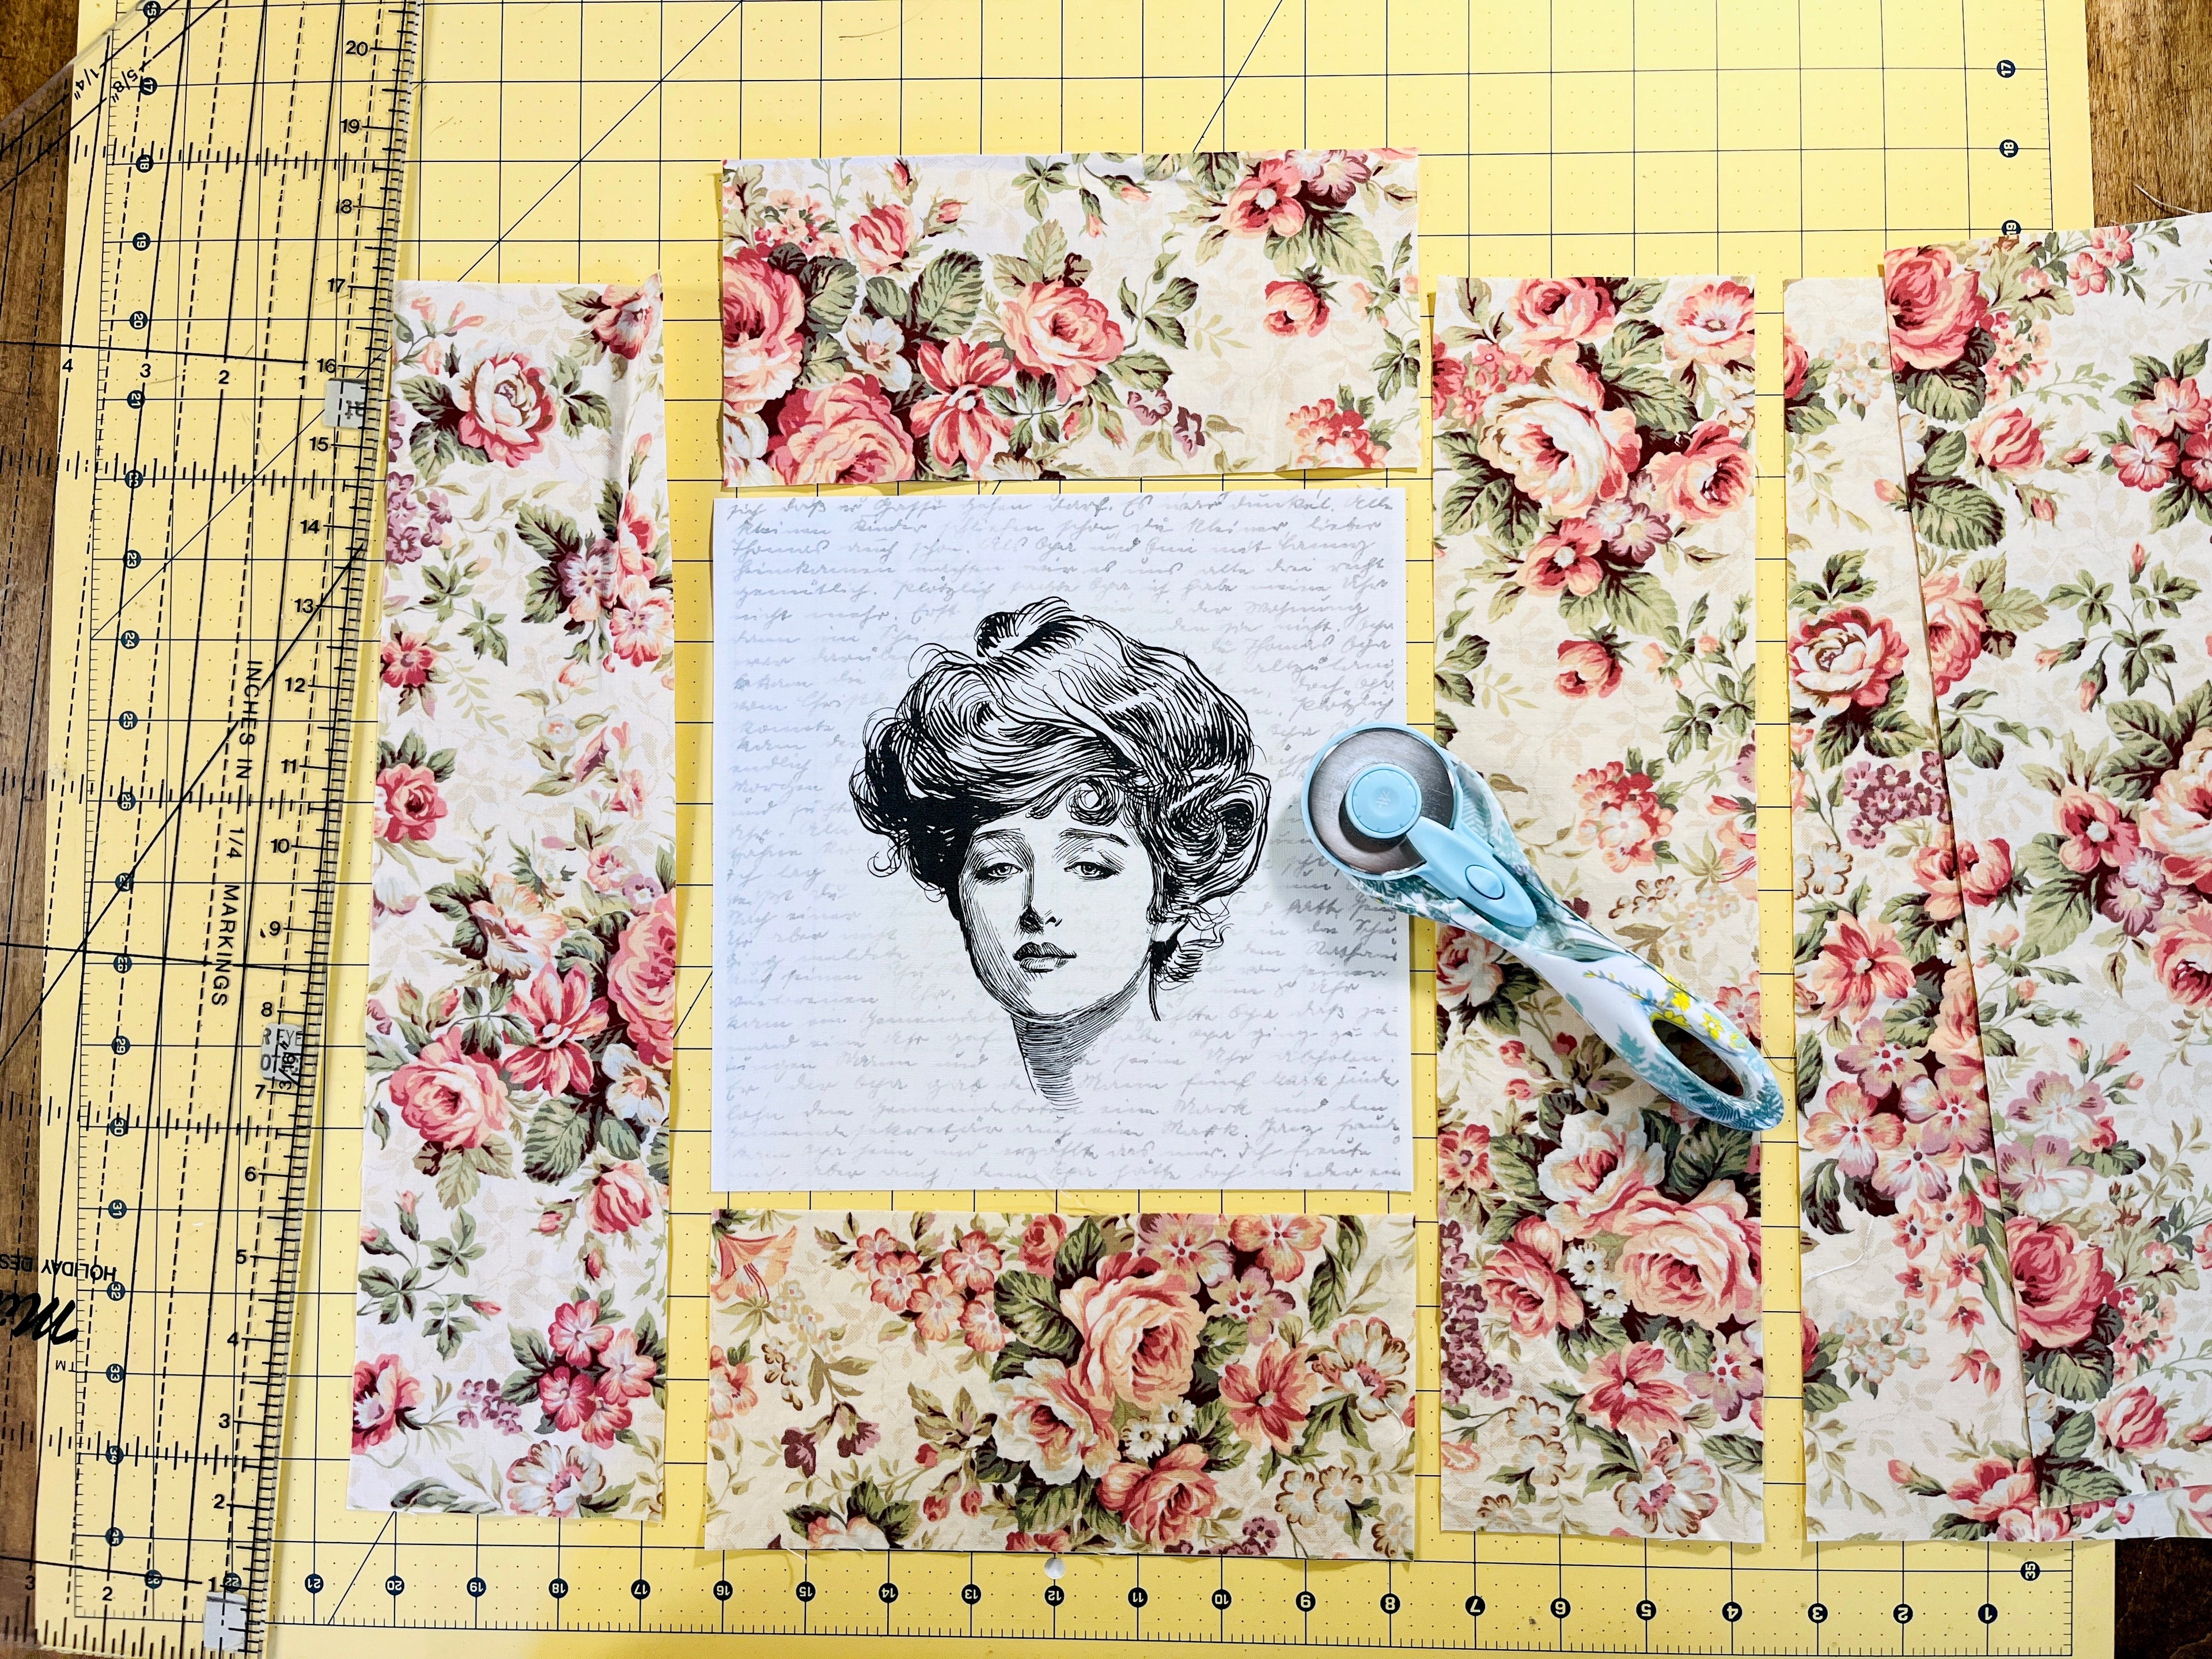
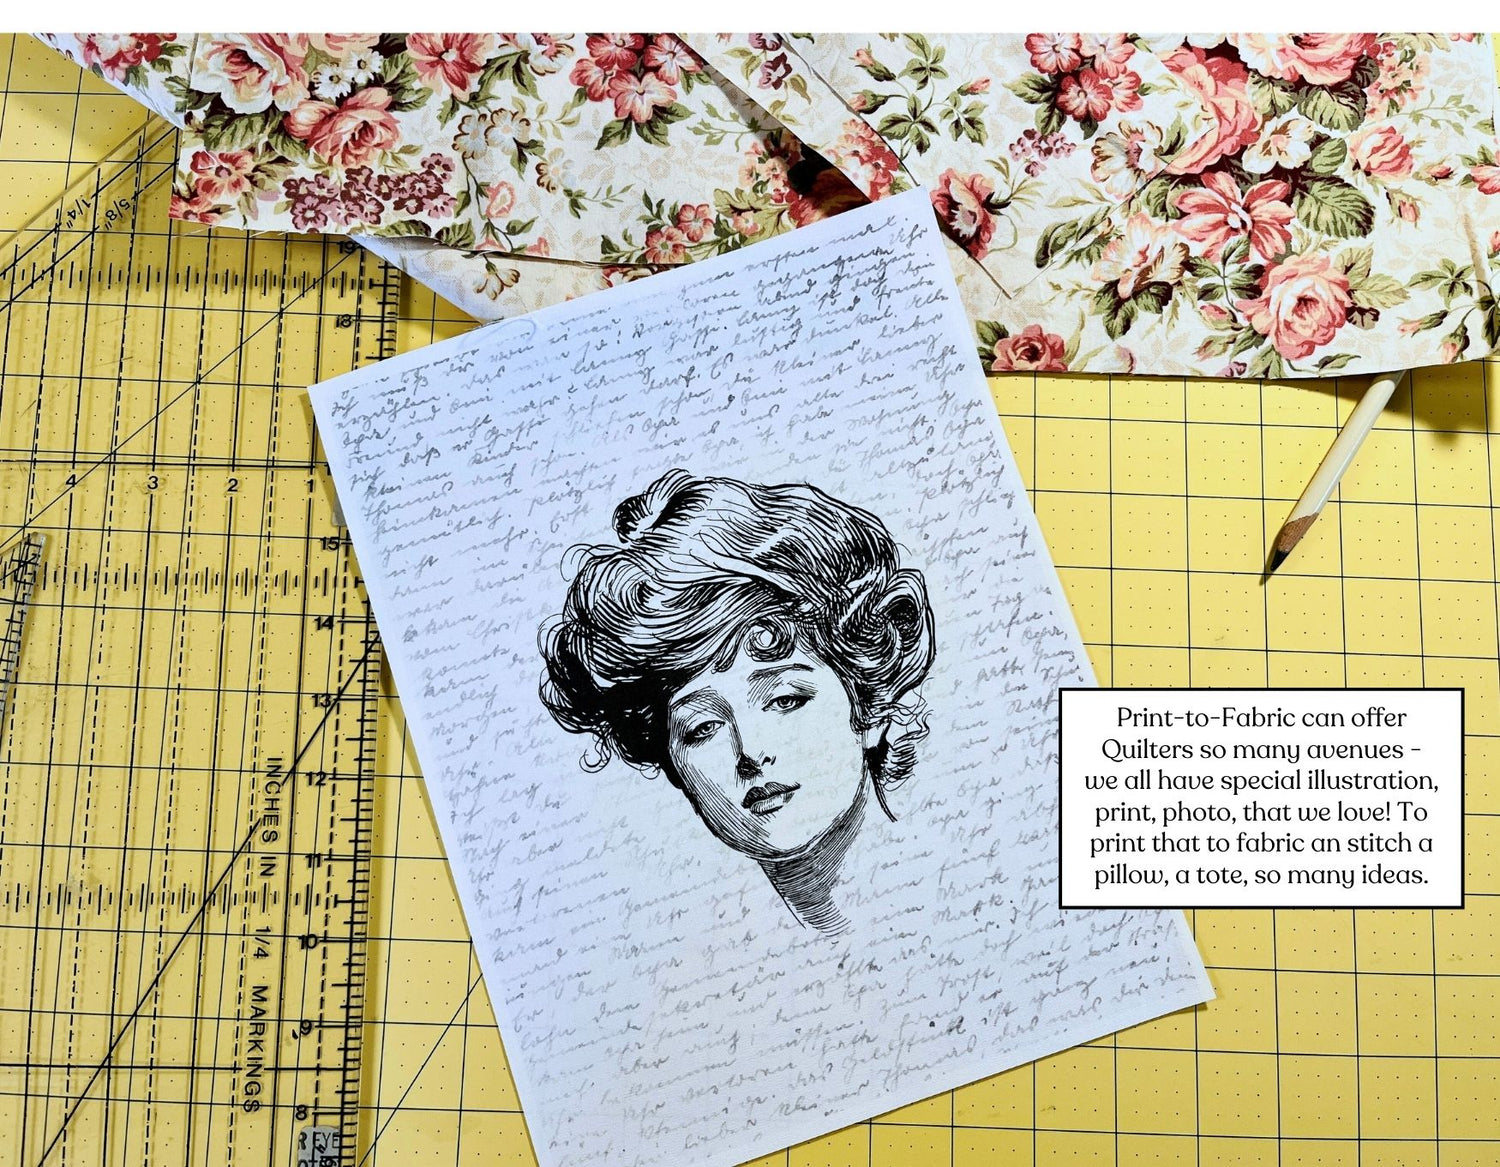
Choose a favorite Inkjet fabric pack or a fabric with good a texture/body. you may create collage print as I did in Canva or your favorite program.

Directions can be found in another blog - printing Quilt Labels - (See button below).

• Our Print: 8.5x11" letter size print trimming to 8x8". The 4x9" fabric and 4x16" will frame the 8x8"
print.

How to Print to Fabric - Quilt Labels
diagram of parts of tote bag assembly

Guidelines for Front of Pillow

This is a quick layout for Front of Pillow - seams are 1/4" , start with top and bottom, then sew the sides. Press seams -

Fusible fleece is ideal for this project as it adds both body and a quilted feel when sewn. You can find it at your local fabric store, and look for one that is approximately 1/8 to 1/4 inch thick.
Press the fusible fleece to the back of both the front and back assemblies, cutting it 1" shorter on 2 sides and follow the fusible instructions, ensuring that the fusible is 1/2" inside the perimeter of the fabric.

sewing quilt lines with masking tape

Sewing Straight Quilt Lines using Masking Tape

You now have a back fabric and your front fabric assembled with your design framed with pieced border, and you have press seams and fusable fleece in place.

Using 1" masking tape, lay tape 1" apart as in the photo starting from the center out. Do the same with the front, stopping at the design print, and backstitch a couple of
stitches. Sew along masking lines, and finish having 1" quilted rows.

  • for Pillow Back

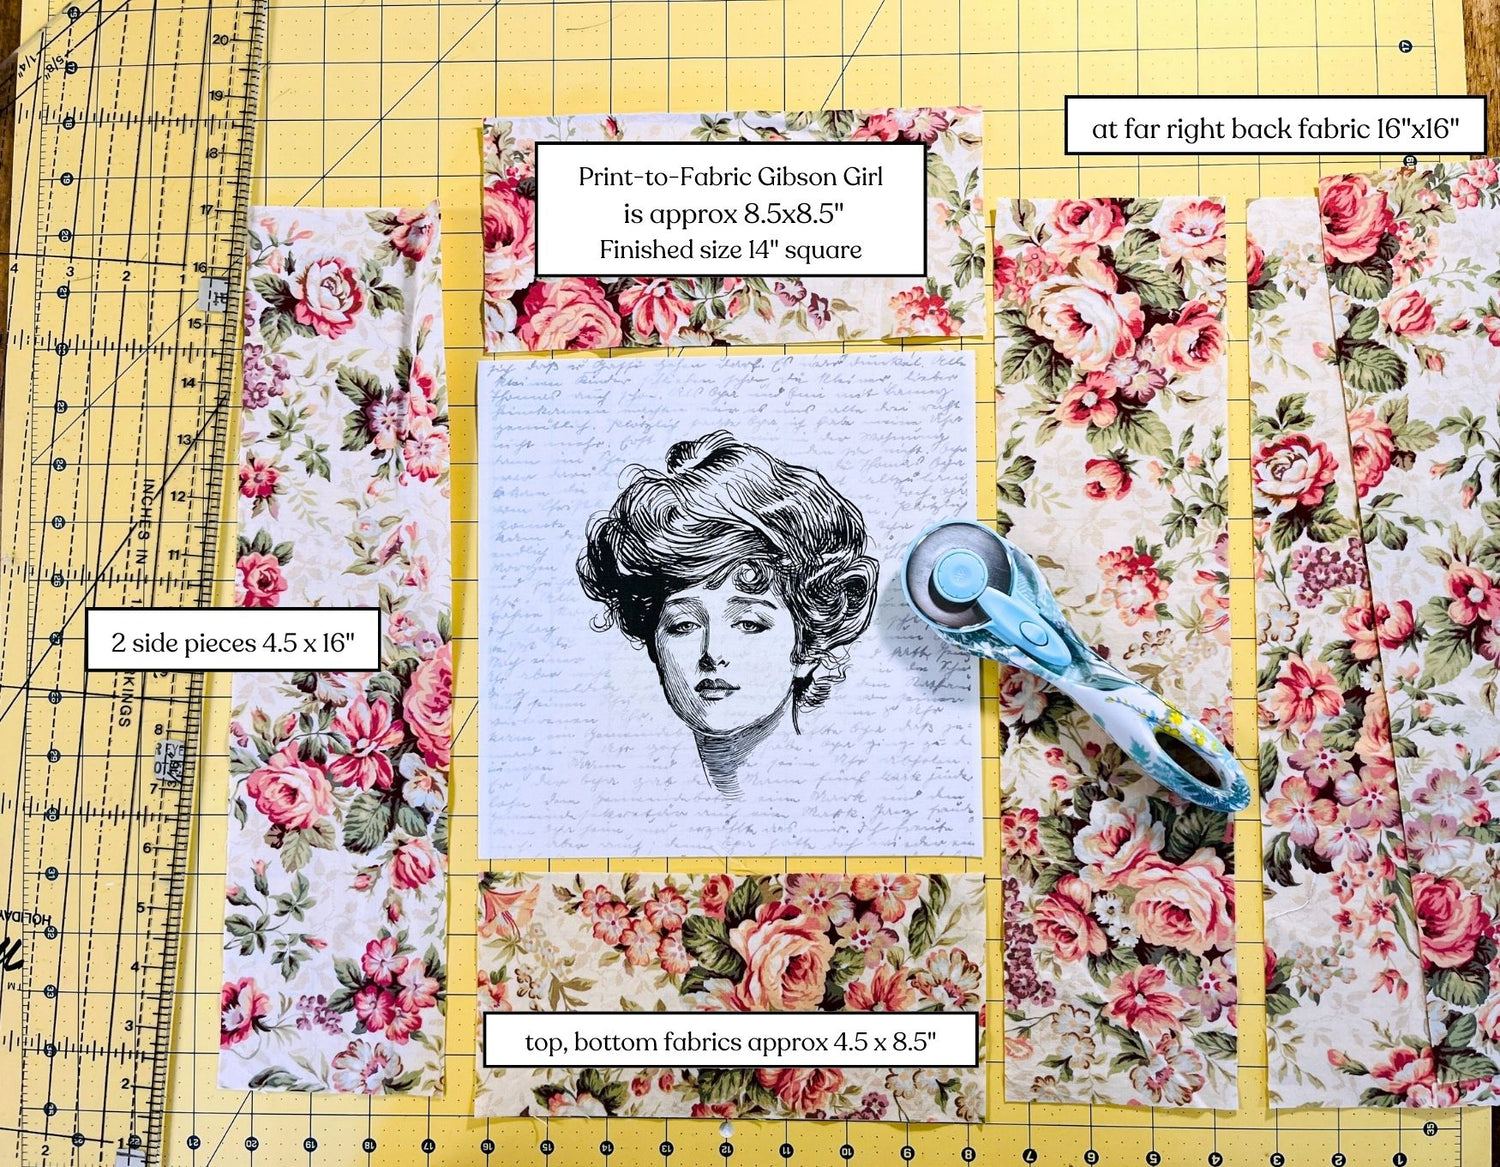
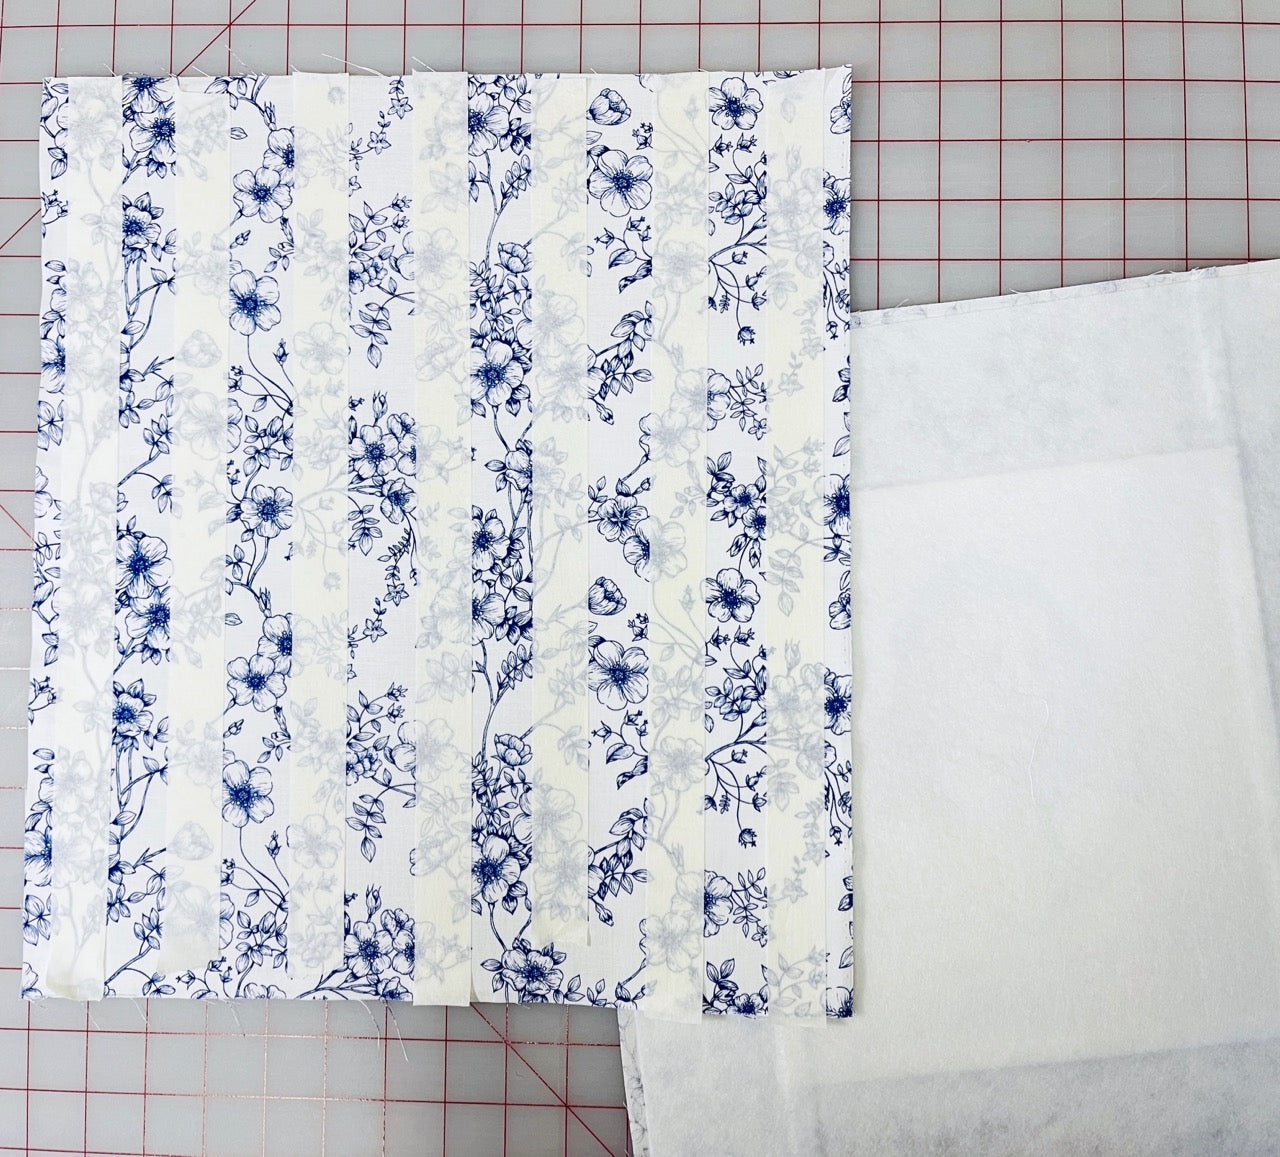
    Illustration for pillow back - You may choose fusible interfacing for body - hem top of both sections and overlap 3" to 4" - pin securing the overlap - next -

  • To the Finish -

    Place right sides together keeping overlap for pillow opening. Sew around perimeter 1/2", clip corners and turn inside out.

  • Hint

    A roll of tape, a jar can make a good template for creating corners for your pillow before sewing!

Back to blog

Leave a comment